how I made light trails (in the field of photography)
In 23 May 2020, I had the privilege of meeting Benjamin Suttmeier for a crash course on How To Scout Locations For City Photography.
On that evening, (8 PM with unbelievable humidity), he introduced me to the cool visual effect of light trails.
What is a light trail?
Here is an example, all the way from Spain.
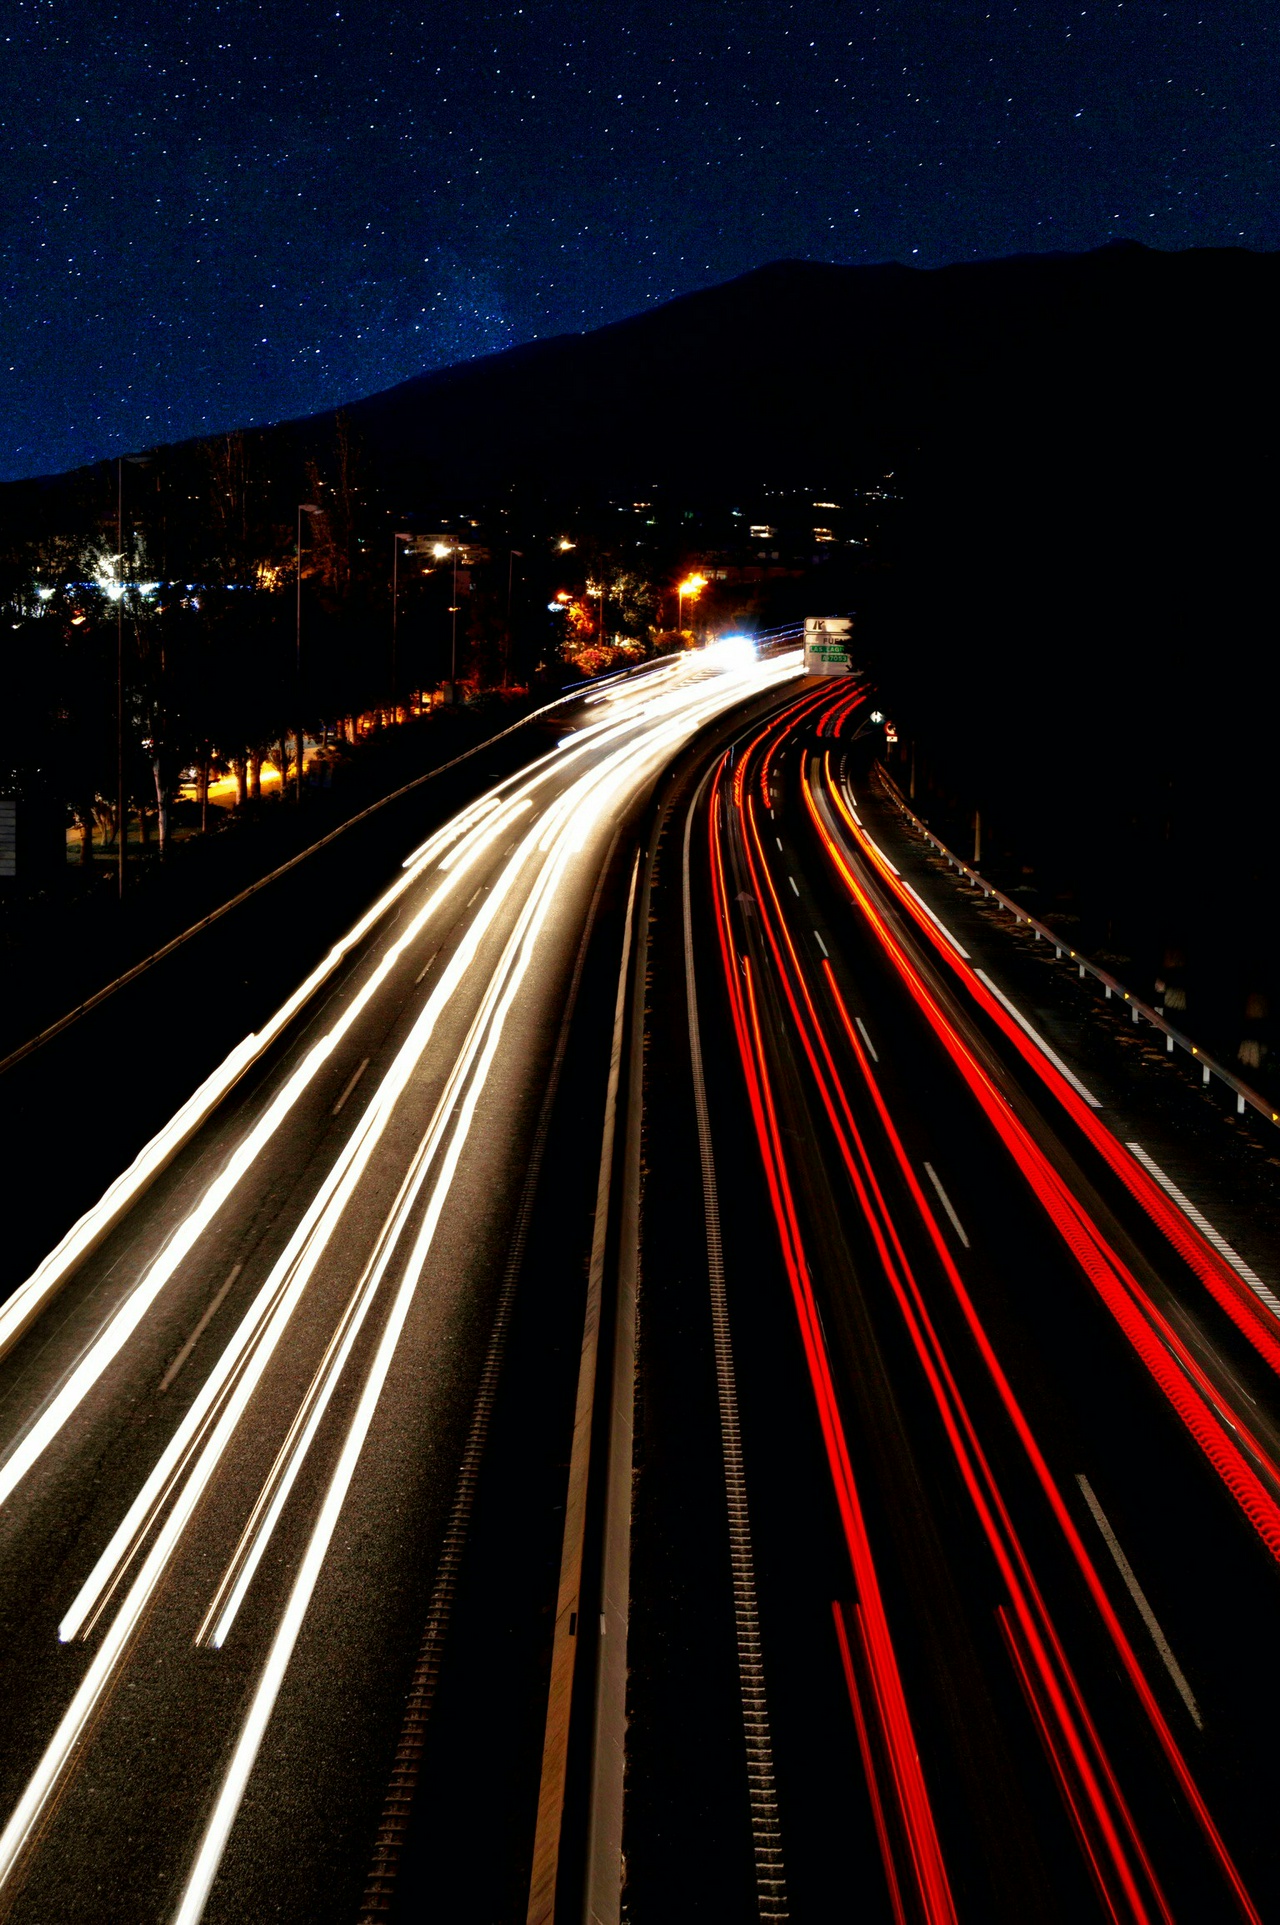
Photo by Caleb Stokes on Unsplash.
And here are my results, after much trial-and-error (from twiddling with the knobs and dials on a camera that a friend recently gifted to me.)
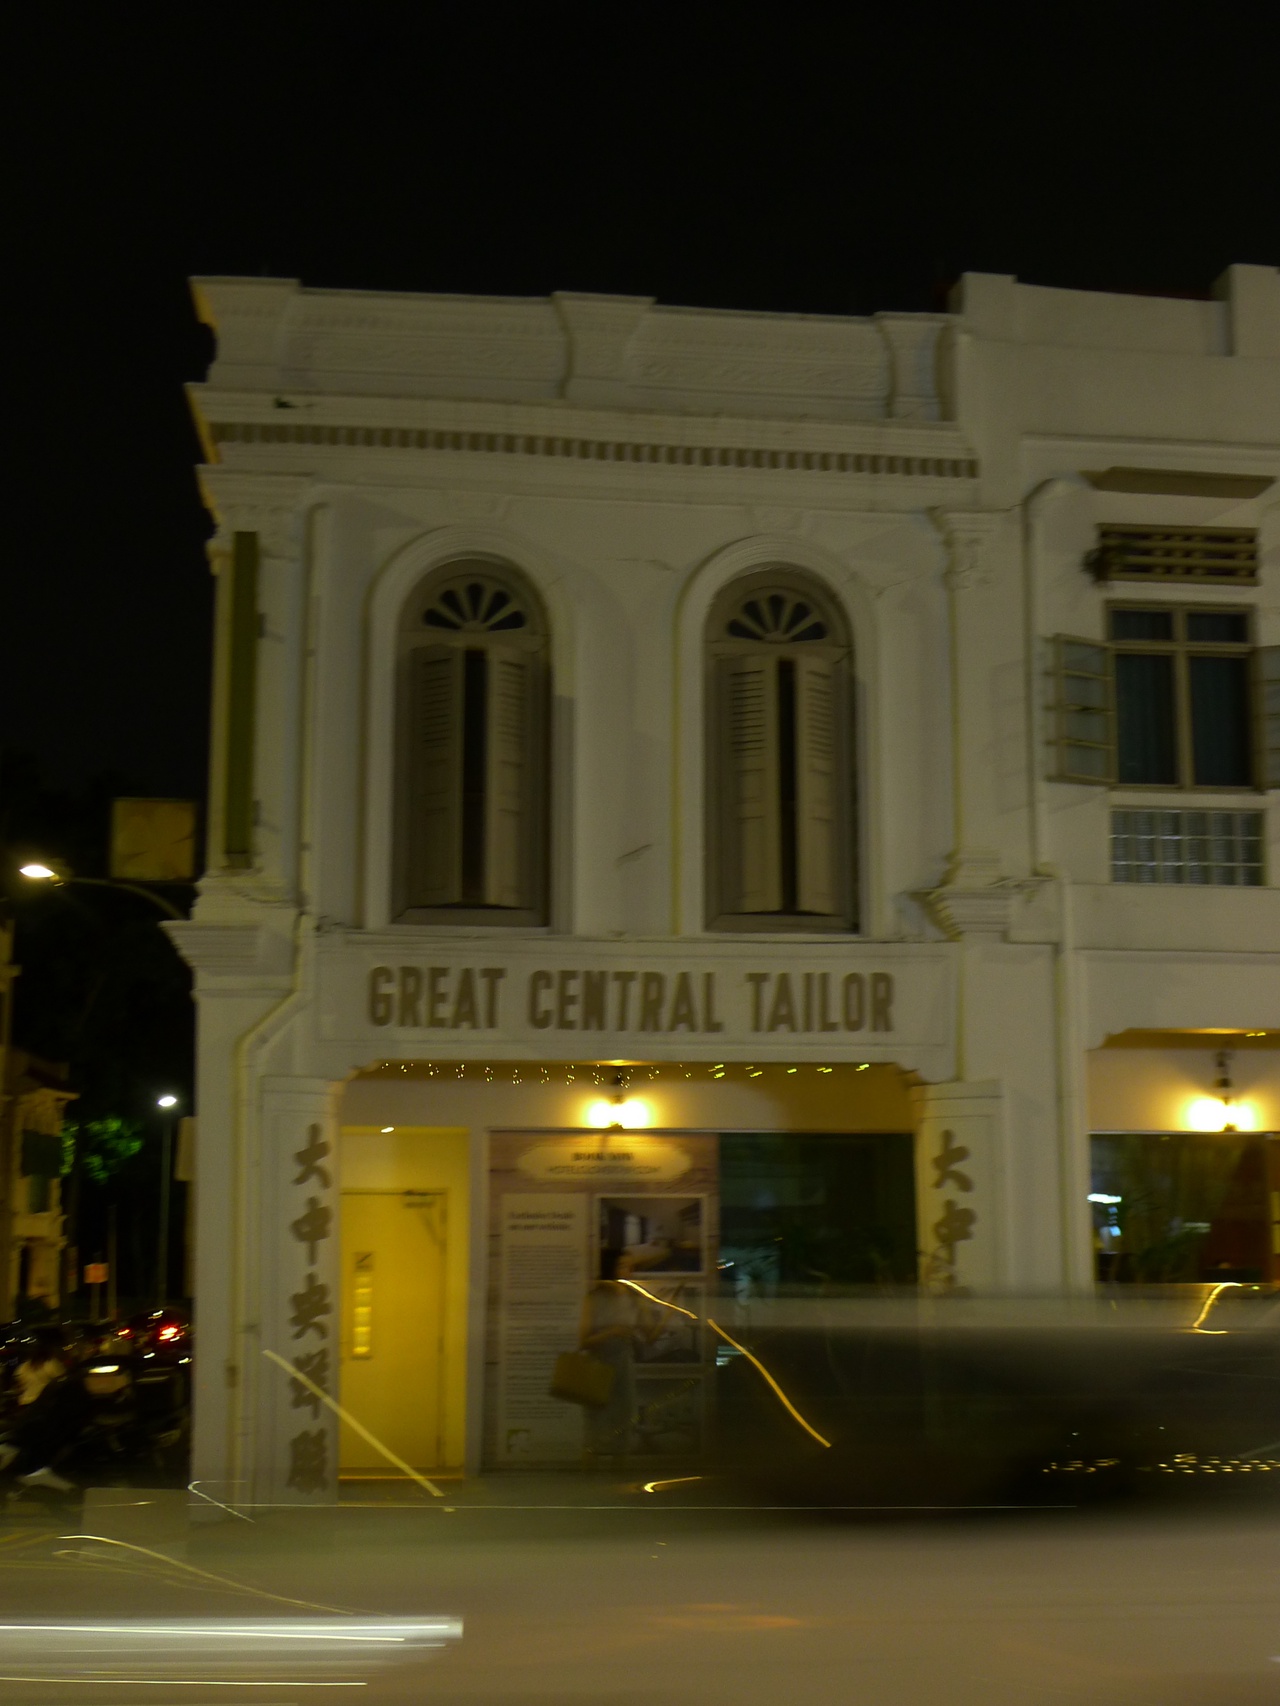
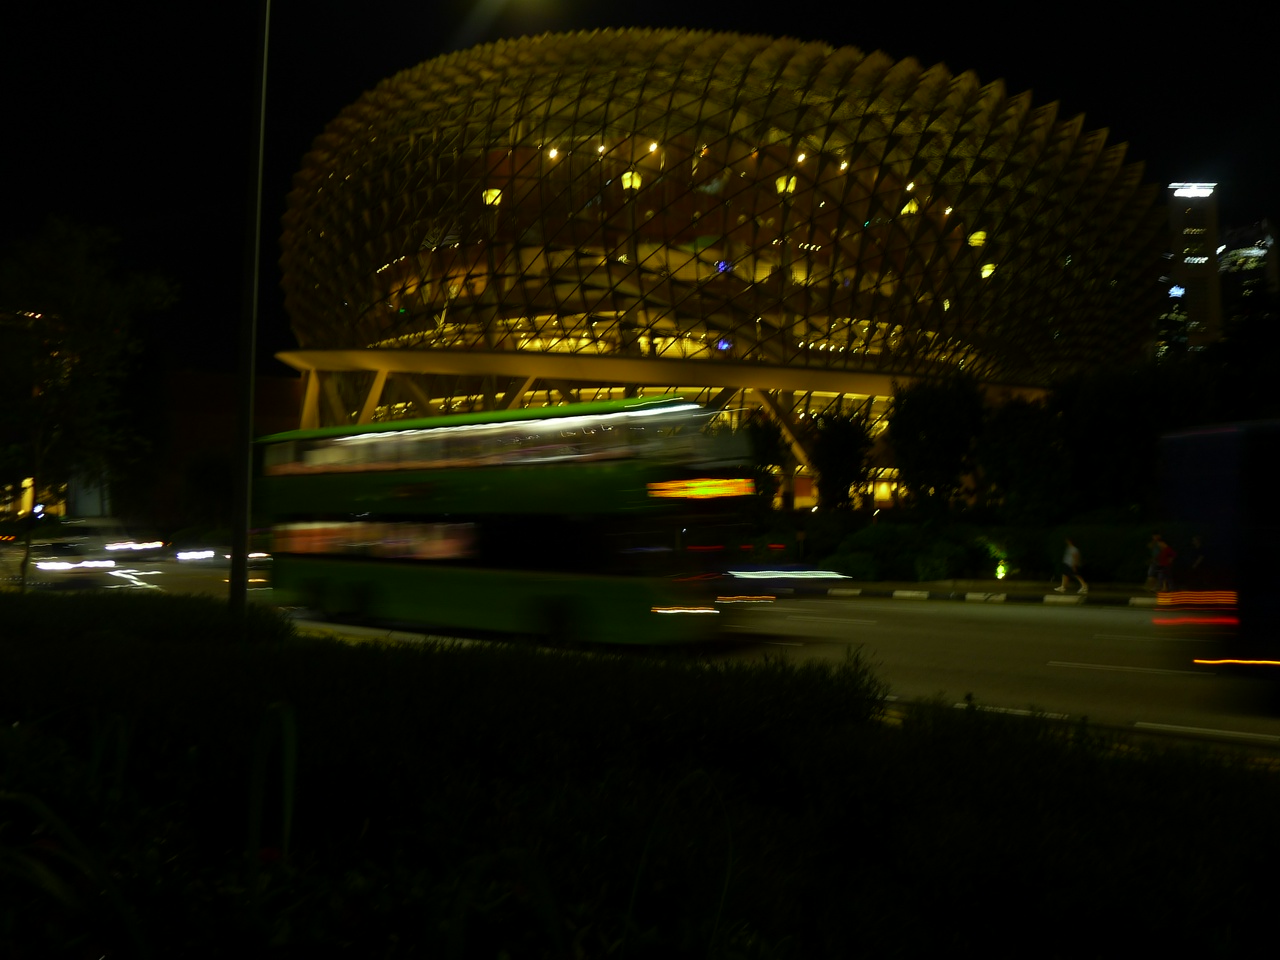
Don't laugh, I tried my best. Say it is a masterpiece. Say it!
How to make a light trail
This sounds scary, but I'm going to introduce something called an Exposure Triangle.
Basically these are fundamental settings that determine how an image turns out after light passes through your camera. You may have heard that photography means “painting with light”, when you dig into the etymology.
So I adjusted the settings on my camera, according to a handy Cheat Sheet below.
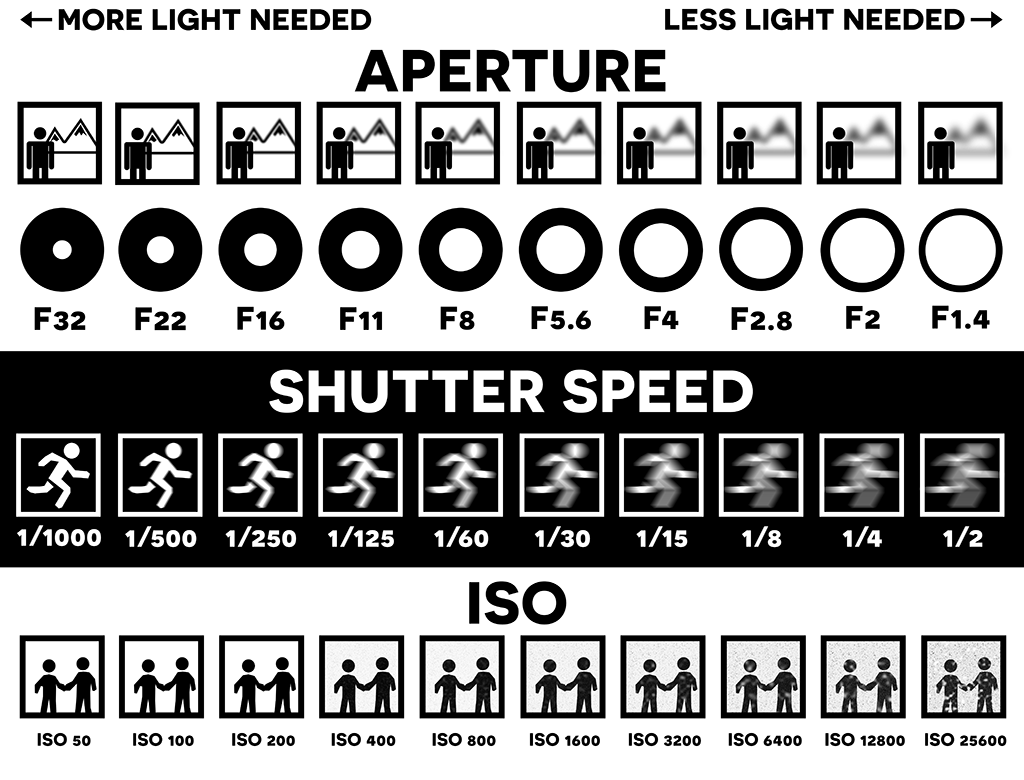
cheat sheet is courtesy of an anonymous contributor.
As you may have guessed from the cheat sheet, I deliberately chose settings that let in more light, and which keep the shutter open for long enough for the vehicle lights to be “painted” into the final image.
Technically speaking, I used an aperture setting of 2.5 f-stops. And a shutter speed setting of ¼. And an ISO setting of 100.
Whew, that's a lot of words. I think I'm done with this blog post.
Thank you, Dan Nian and Jill, for the lovely camera, (a Panasonic Lumix DMC-LX5).